1. Download the Windows driver in .exe or .zip format
2. Run and/or extract the file to temporary directory (for example: c:\temp\k4jrg); you will point to this location when prompted after plugging in the device.
3. Insert the device in a USB port
This section installs the virtual COM port:
4. Select "Install from a list or specific location (Advanced)
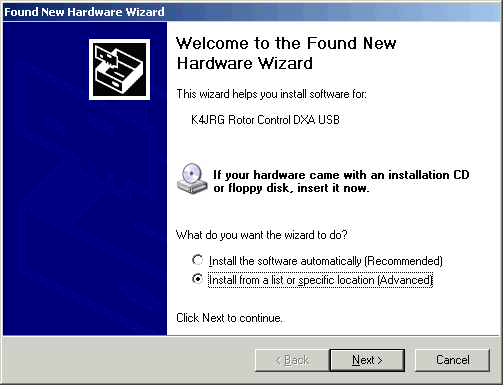
5. Select the location where you saved the K4JRG drivers
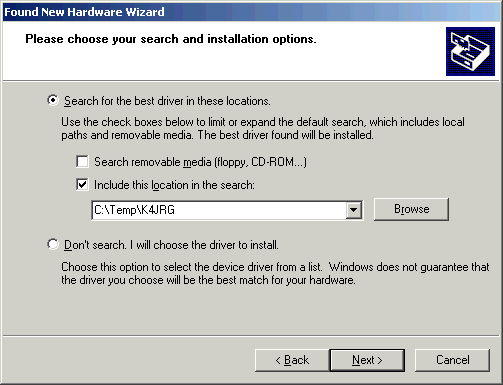
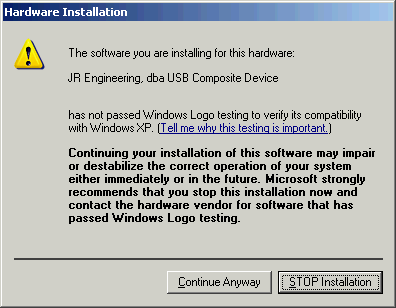
6. Unsigned driver prompt, select "Continue Anyway"
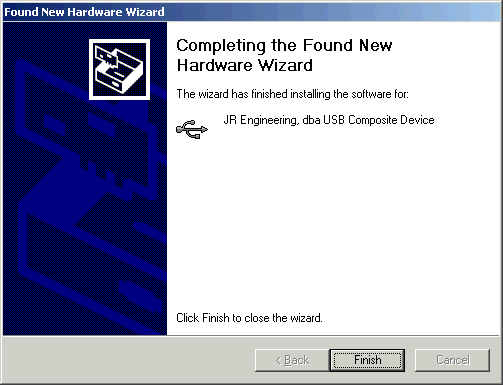
7. Click Finish on the following prompt
This bubble pops up in the task bar:
8. You will then get prompted for the actual device installation: K4JRG Rotor Control DXA USB
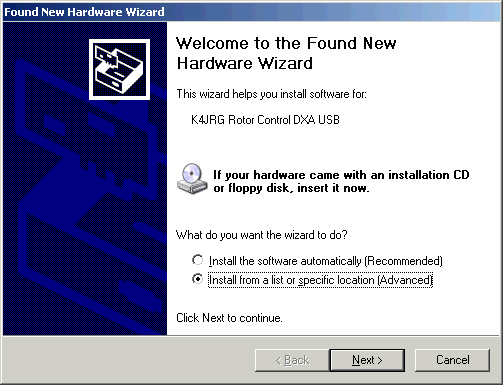
9. Again, select the driver temporary location.
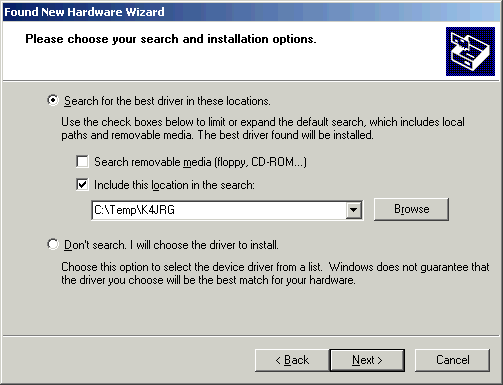
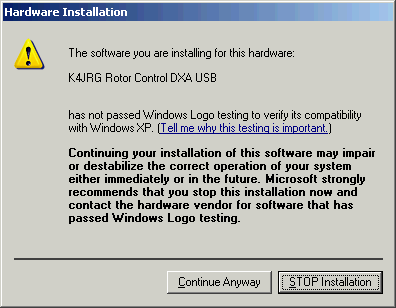
10. Click Continue Anyway on the Hardware Installation prompt
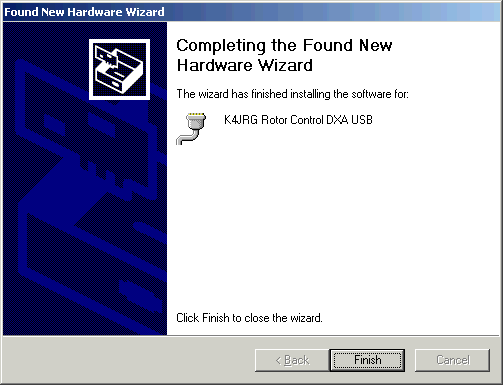
11. Click Finish to complete the install
To verify the driver has been installed and to what COM port:
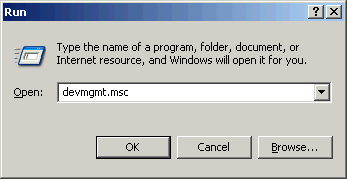
1. Open the device manager by selecting Start, Run and typing devmgmt.msc
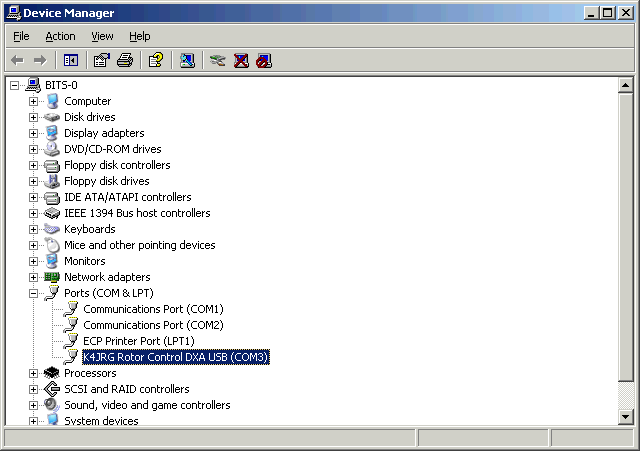
2. The Device Manager opens up. Expand the "Port" section by clicking on the + sign. Your COM port number might differ from the one shown below
2. Run and/or extract the file to temporary directory (for example: c:\temp\k4jrg); you will point to this location when prompted after plugging in the device.
3. Insert the device in a USB port
This section installs the virtual COM port:
4. Select "Install from a list or specific location (Advanced)
5. Select the location where you saved the K4JRG drivers
6. Unsigned driver prompt, select "Continue Anyway"
7. Click Finish on the following prompt
This bubble pops up in the task bar:
8. You will then get prompted for the actual device installation: K4JRG Rotor Control DXA USB
9. Again, select the driver temporary location.
10. Click Continue Anyway on the Hardware Installation prompt
11. Click Finish to complete the install
To verify the driver has been installed and to what COM port:
1. Open the device manager by selecting Start, Run and typing devmgmt.msc
2. The Device Manager opens up. Expand the "Port" section by clicking on the + sign. Your COM port number might differ from the one shown below
Rotor Control DXA USB Drivers
Install Instructions for Windows
Install Instructions for Windows